About 2 and a half years ago, I set upon what would be the first step of my career in cloud computing. While skeptical at the time, I very quickly adapted and realised the immediate benefits I was getting from AWS, and especially how I, as a developer, was going to benefit.
I first came into contact with cloudformation when our platform team told us about our base infrastructure repo, where I was to spin up the s3 buckets I needed for something I was working on. No problem, I thought, it’s just YAML.
But that’s where it got daunting.
The Rub: Getting Started
At least when I started learning, there really wasn’t a lot to help me get started. I just kind of copy-pasted snippets and asked one of the platform guys to help me lock it down, and that was the way my habits continued for a while.
I started truly understanding how great of an idea Cloudformation and infrastructure as code (IoC) was when I first started studying for some AWS certifications and realised I was no longer going to have to wait for anyone to provision or order anything for me.
While Terraform is starting to pick up steam as of the time of writing, I’m going to focus on CloudFormation, because that’s what I’ve come to know and have a decent handle on. I’ll also be using YAML, because it’s what I’m used to. If you prefer, you can do the exact same things in JSON, just translate the values across and it should work.
General hints
Here’s a few hints for those feeling time poor:
- Use an IDE with a Cloudformation plugin. I use IntelliJ, but VSCode
also has an official plugin and there’s at least a community plugin for vim.
- Make dependencies explicit in your templates. I’ve been caught
out a couple of times where I thought AWS would be smart enough to figure it out, doesn’t always work that way
- If you find yourself bringing up resources with the same general
configuration a lot, use a nested template with parameters instead
- Cloudformation isn’t a replacement for Ansible, Chef, Puppet, etc.
Remember to pick the right tool for the job and don’t just ram Cloudformation in everywhere
- Amazon Connect isn’t supported.
- Remember to use tags and descriptions. It makes it easier to
remember what things are for if someone asks.
- Cloudformation itself is free, you only pay for the resources
you bring up
Infrastructure as Code
The most obvious benefit is version controlled operations. Using git or another VCS to keep track of templates
Templates
It all starts with the idea of a template, and they will all start the same way
AWSTemplateFormatVersion: 2010-09-09This will start you off by telling Cloudformation (herein referred to as CFN) what version of the DSL you want to use. This will be unlikely to change in the foreseeable future.
Next we’ll have a look at the different sections that make up a template
Transform
This allows you to use macros to make your templates less verbose.
This is a little beyond the scope of a Getting Started type post,
but the main one I use is the AWS::Serverless transform which
adds some convenience around Lambdas and events
Resource
The main meat of the template, this section defines the infrastructure you’re deploying. You use this section to tell CFN what to provision for you.
For example, say you wanted to define a set of subnets, you could do it thusly:
Subnet1:
    Type: AWS::EC2::Subnet
    Properties:
      CidrBlock: 172.31.0.0/20
      VpcId: SomeVpc
Subnet2:
    Type: AWS::EC2::Subnet
    Properties:
      CidrBlock: 172.31.16.0/20
      VpcId: SomeVpc
Subnet3:
    Type: AWS::EC2::Subnet
    Properties:
      CidrBlock: 172.31.32.0/20
      VpcId: SomeVpc
A resource will always have Type and Properties blocks, though
the properties will be different depending on the type of resource.
A full resource type reference can be found
here
Parameters
Inputs to your template. An example might be if you have multiple environments, such as staging and production, and want to put that in resource names somewhere. You can declare them as such
Parameters:
    Foo:
      Type: String
      Description: The foo parameter
      AllowedValues:
        - bar
        - baz
      Default: bar
    Spam:
      # CFN comes with some things to make it a little easier
      # to sanity check
      Type: AWS::EC2::Subnet::Id
      Description: Subnet to connect to
You will always have to declare the type of the parameter. You can find a list of types here
These parameters can be referenced using the !Ref function. For example,
if we had the above parameters, we could use them like such
Foo:
  Type: AWS::RDS::DBInstance
  Properties:
    #  ...
    DBInstanceIdentifier: !Ref Foo
Mappings
The mappings section lets you define dictionaries that can be
referenced elsewhere in your template. This section can be useful
if you have values which will stay constant across deployments, or
are directly related to a Parameter and don’t require their own
inputs. Use the FindInMap function to grab the values. Example:
Parameters:
  Environment:
    Type: String
    AllowedValues:
      - test
      - production
Mappings:
    InstanceSettings:
      InstanceType:
        test: t2.micro
        prodction: t2.xlarge
Resources:
    MyMachine:
      Type: AWS::EC2::Instance
      Properties:
        InstanceType: !FindInMap [InstanceSettings, InstanceType, !Ref Environment]
Outputs
Here we can output and export values from our template, for example
DNS names, IPs, ARNs, etc. You can use the GetAtt function to
pull useful values out of resources and put them in the output
Outputs:
    Foo:
      # A basic output
      Value: Bar
    DbAddress:
        # Using GetAtt
        Description: Endpoint address of the database
        Value:
          Fn::GetAtt:
            - Db
            - Endpoint.Address
A full template example
Here’s one you can steal and play with
AWSTemplateFormatVersion: 2010-09-09
Parameters:
    # When uploading via the console, CFN will let you choose
    # these parameters. If using the CLI, use
    # --parameter-overrides
    EnvironmentName:
      Type: String
      Description: Name of the environment
      AllowedValues:
        - test
        - production
    DeploymentSubnet:
      Type: AWS::EC2::Subnet::Id
      Description: Subnet to attach to
Mappings:
    InstanceSettings:
      InstanceType:
        test: t2.micro
        production: t2.large
Resources:
    AppServer:
      Type: AWS::EC2::Instance
      Description: Our application server
      Properties:
        InstanceType: !FindInMap [InstanceSettings, InstanceType, !Ref EnvironmentName]
        SubnetId: !Ref DeploymentSubnet
        # Amazon Linux AMI
        ImageId: ami-0b8b10b5bf11f3a22
Outputs:
    HostDns:
      Value:
        # Get the public DNS name of the server
        Fn::GetAtt:
          - AppServer
          - PublicDnsName
      Export:
        # Export it for other templates to use
        Name: AppServerHost
Deploying a template
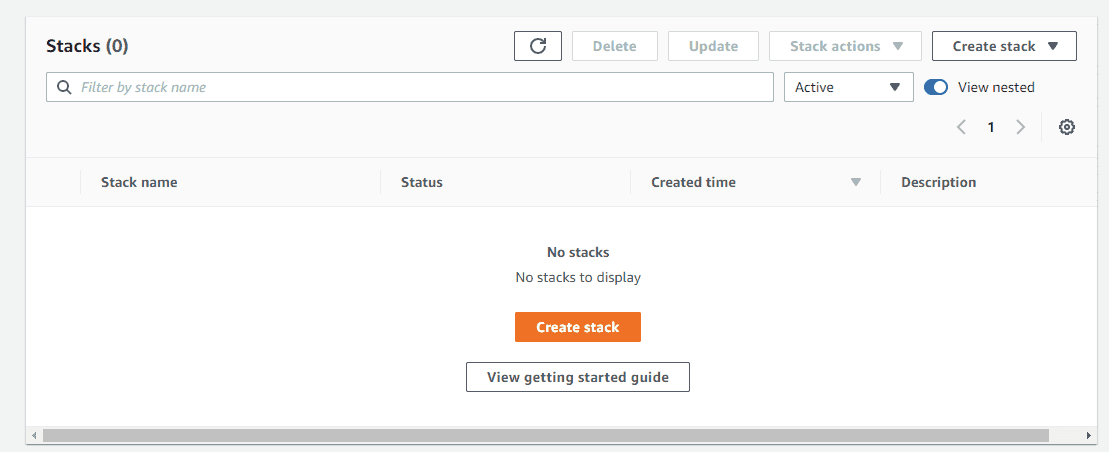
Via the console
Finally, let’s deploy this bad boy. Navigate to the Cloudformation
console and hit create stack
Next we’ll upload the template. You can either manually put it in
S3, or just have the console do it for you. I’ll be choosing
the test environment option and my public subnet from the dropdowns
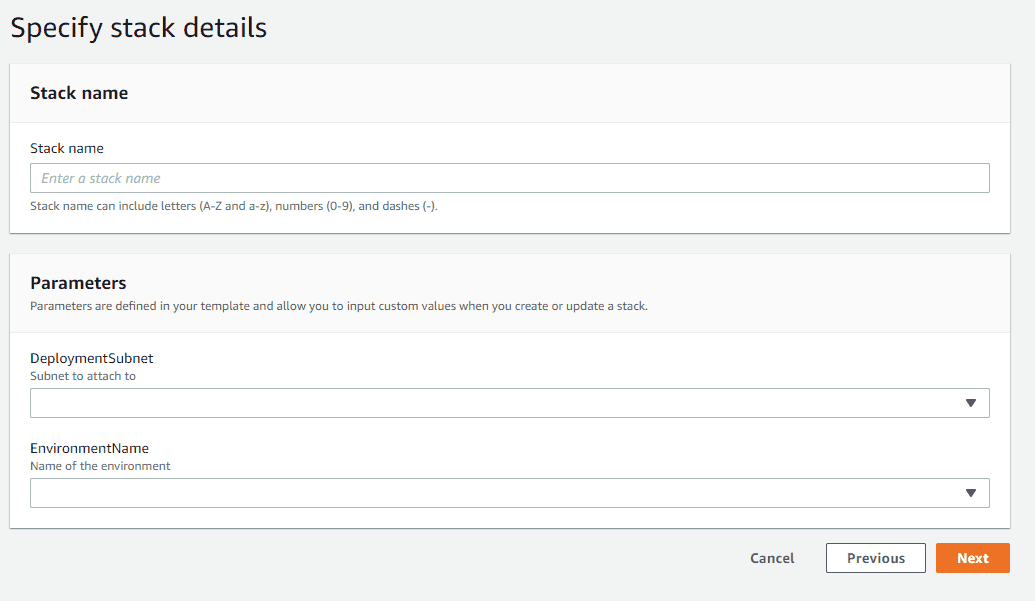
You can skip the next screen for now, we don’t need it. Just hit
next to go to the review screen and start the deployment.
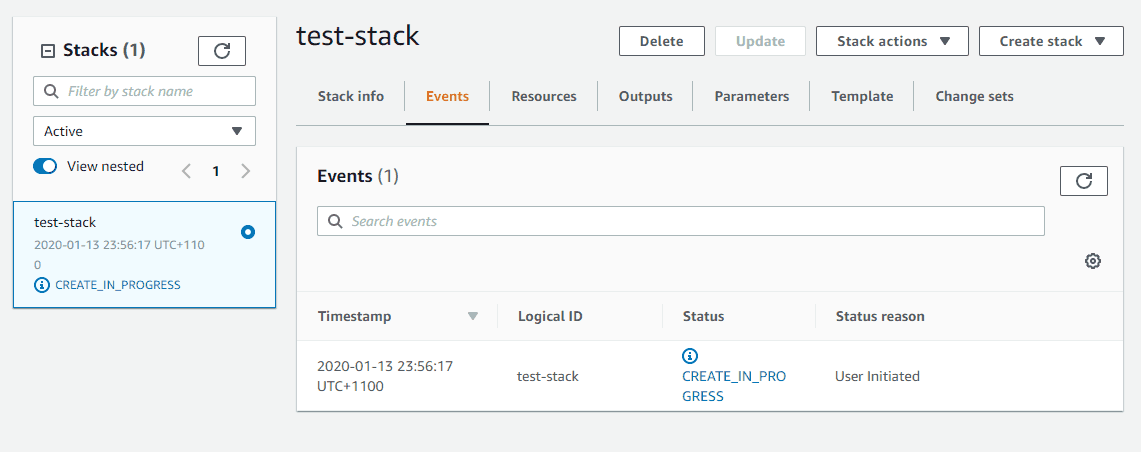
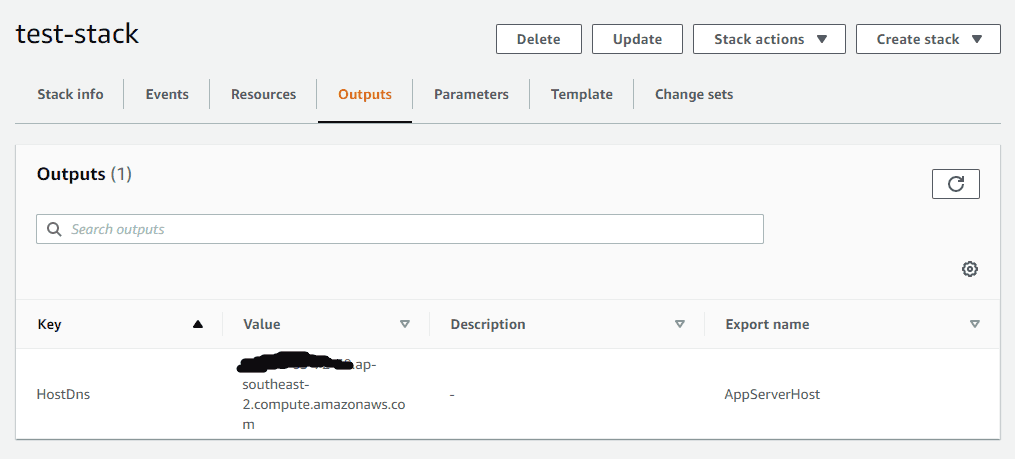
Now sit back and wait until you see AppServer has been created
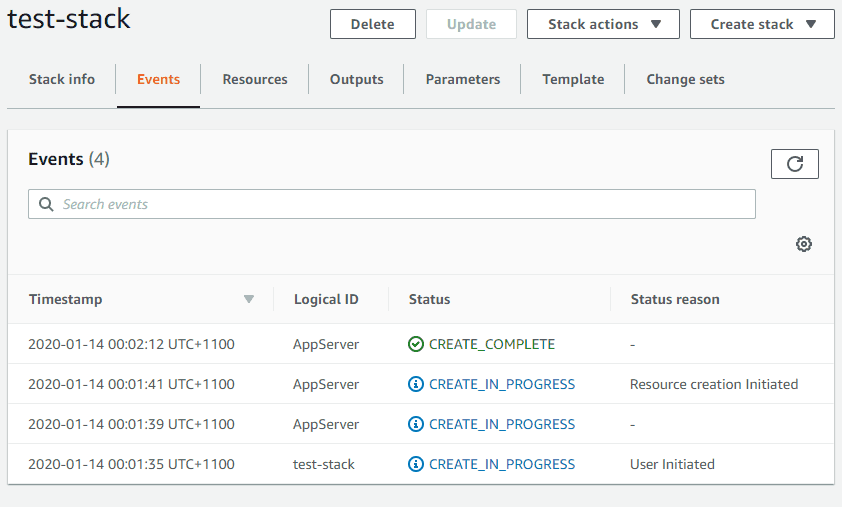
You can also use this chance to have a look at the outputs
And now navigate over to the EC2 console and have a look at your
instances. You should see your new instance ready to go, and
be able to connect with aws ec2-instance-connect

Via the CLI
Here the aws cloudformation deploy command is your friend.
To deploy this one I’ll be running
    aws cloudformation deploy
        --template-file ./example.yaml
        --parameter-overrides EnvironmentName=test DeploymentSubnet=subnet-3e727377
        --stack-name test-stack
And after some waiting we’ll see everything we saw when deploying
from the console, and a message telling us what’s up in the terminal

Useful functions
Finally, we’ll go over some useful functions available in CFN templates, some of which have been previously mentioned
Fn::Refor!Ref- Refer to another value in the template, eg
parameters or resource names, !Ref Foo
Fn::Subor!Sub- Substitute values into a string, eg
!Sub processing-lambda-${EnvironmentName}
Fn::FindInMapor!FindInMap- Look up values in a mapping
dictionary, !FindInMap [Key1, Key2, Key3]
Fn::Join- Join strings together,
Fn::Join:
    - /
    - - http:/
      - !Ref WebsiteHost
- index.htmlFn::GetAtt- Get an attribute from a resource, such as the ARN,
hostname, etc
Fn::GetAtt:
    - FooBarServer
    - PublicDnsName
Conclusion
Just with this you can accomplish 90% of the things
you’ll want to do when you start off. Currently where I work,
all my templates are written similarly to the example one above,
and I have CI/CD scripts using the deploy command and not much
else. Seems to work well enough, though in previous places I’ve
seen stacks just kind of lock up and need to be deleted which worries
me a little. Whether that’s just due to the complexities and
intersections between Jenkins and AWS I’m not sure, but it’s
something I keep thinking about how to solve without nuking all my
infrastructure.