I’ve had three weeks off from work for a little break after a particularly tough job, so I decided to start sharpening some of my AWS knowledge and actually get that DevOps Pro certification sometime soon.
One of the practice questions I was looking at dealt with quickly spinning up EC2 instances in an autoscaling group, the answer to which was to bake an AMI using a script. I realised I’d never actually done that before, so thought I’d give it a go.
The Repo and Things I can probably improve on
Here’s the gitlab link. This is just a barebones thing to prove to myself I can do it and to have a reference I can pilfer code from later on. There’s a couple of things I think I can improve on here:
- Better deployment of the code to the AMI build instance. Using
scpand SSH seems a little clunky, I reckon there’s probably a better way using Ansible or the like. - Cleanup. I think the way I make sure the instance is shutdown can be improved, probably using tags to find the instance rather than keeping the ID in a file
- Python scripts would probably be a better way to do this. Bash works, but like anything it can be a bit difficult to debug
- I could probably be a little smarter about bidding on spot instances and get a better rate.
What I’ve Built
Let’s have a look at the pipeline
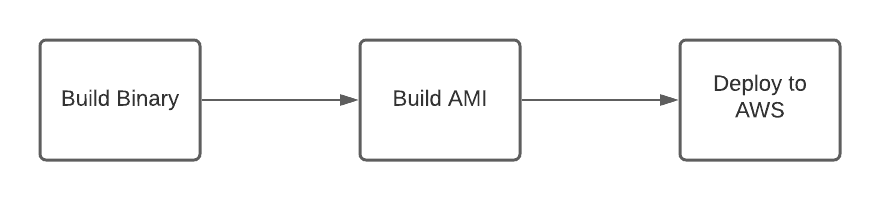
Very simple, nothing special in these steps.
Build the Binaries
The first gitlab job is specified as such
Build Binary:
  stage: build-binary
  image: golang:alpine3.13
  variables:
    GOOS: linux
    GOARCH: amd64
    CGO_ENABLED: 0
  artifacts:
    paths:
      - build/
  script:
    - go build -o build/hello-world cmd/main.go
We just put the compiled binary into the build folder and export it as an artifact
One thing I noticed, in order to do it this way we need to turn CGO off to make it run, otherwise we get linker issues at the end of the road.
Build the AMI
Here is the meat of the operation. The ami-baker.sh bash script here does a few different
things:
- Generates a temporary RSA key
- Orders a spot instance
- Uses
scpto copy over the binary we built in the last step - Uses
sshto put the binary in/optand configure systemd - Calls the create image API to generate the AMI
- Shuts down the build instance
The gitlab job:
Build AMI:
  stage: build-ami
  image: registry.gitlab.com/gitlab-org/cloud-deploy/aws-base:latest
  dependencies:
    - Build Binary
  artifacts:
    paths:
      - build/ami_id
  before_script:
    - apt-get update
    - apt-get install -y ssh jq
  script:
    - mkdir -p build
    # Sub in our variables
    - cat launch-spec.json | jq ".ImageId=env.BUILD_IMAGE" | jq ".NetworkInterfaces[0].Groups=[env.BUILD_GROUP]" | jq ".NetworkInterfaces[0].SubnetId=env.SUBNET_ID" > build/launch-spec.json
    # Make sure our script is executable
    - chmod +x ./ami-baker.sh
    # Make the AMI
    - ./ami-baker.sh
  after_script:
    # Make sure the build instance is terminated. Swallow the error code because we don't want a
    # successful run to choke it
    - ls -R
    - aws ec2 terminate-instances --instance-ids `cat build/build_instance_id` || exit 0
This is where I came to the conclusion I probably should have used python. I downloaded jq to
manipulate the JSON, and the script itself is a bit of a mess. You can see it in the above gitlab
repo, but I’ll break down the main parts.
Generating a launch specification
The first step is to spin up a machine to with which to generate the image. For that we’ll need a launch specification.
The launch specification file looks like the following
{
  "ImageId": "ami-075a72b1992cb0687",
  "InstanceType": "t3.nano",
  "BlockDeviceMappings": [
    {
      "DeviceName": "/dev/xvda",
      "Ebs": {
        "DeleteOnTermination": true,
        "VolumeSize": 8,
        "VolumeType": "gp3"
      }
    }
  ],
  "Monitoring": {
    "Enabled": false
  },
  "NetworkInterfaces": [
    {
      "AssociatePublicIpAddress": true,
      "DeleteOnTermination": true,
      "DeviceIndex": 0,
      "Groups": [ ],
      "SubnetId": ""
    }
  ]
}
And I’m using jq to set the configurable values, and output it to another file for later use.
cat launch-spec.json \
  | jq ".ImageId=env.BUILD_IMAGE" \
  | jq ".NetworkInterfaces[0].Groups=[env.BUILD_GROUP]" \
  | jq ".NetworkInterfaces[0].SubnetId=env.SUBNET_ID" > build/launch-spec.json
We use our launch-spec.json template file as a base, and fill in the AMI image,
security group and subnet ID for the new instance.
I’ve done this in the .gitlab-ci.yml file, I’m not sure that’s 100% correct, so I guess if I
use this in a production pipeline I’ll have to think about it some more and decide on the right spot.
Ordering a spot instance
EC2 spot instances are a good alternative for ephemeral CPU resources, and we can do this to lower overall costs. To do this, we need to tell AWS how long we’ll be using that resource and what we want to launch. We’ll use the minimum possible block of time, which is 60 minutes, and pass in the launch spec we’ve generated.
export SPOT_REQUEST_ID=`aws ec2 request-spot-instances \
  --block-duration-minutes 60 \
  --launch-specification file://build/launch-spec.json \
  --query SpotInstanceRequests[0].SpotInstanceRequestId \
  --output text`
Once we’ve ordered the instance, the script just loops waiting for the request to be fulfilled. If it gets to 10 iterations, it will cancel the order and exit with an error.
Copying over resources
The script has generated a key for itself at /tmp/sshkey, so we’ll use the
EC2 Instance Connect
API to connect:
aws ec2-instance-connect send-ssh-public-key \
  --instance-id $INSTANCE_ID \
  --instance-os-user ec2-user \
  --availability-zone $INSTANCE_AZ \
  --ssh-public-key file:///tmp/sshkey.pub
I’ve found this can be a bit hit or miss with eventual consistency, so you either have to loop with your connection attempts or sleep for a 10-20 seconds before trying to jump on.
The scp command is simple enough
scp -o "StrictHostKeyChecking no" \
  -i /tmp/sshkey ./build/hello-world ./hello-world.service ec2-user@$INSTANCE_IP:~/
We copy the hello-world binary and the hello-world.service systemd unit file.
Configure systemd
Forgive this block, this is another reason I should have used python
ssh -o "StrictHostKeyChecking no" \
    -i /tmp/sshkey ec2-user@$INSTANCE_IP \
    "sudo mkdir -p /opt && sudo mv /home/ec2-user/hello-world /opt/hello-world && sudo mv ~/hello-world.service /etc/systemd/system && sudo systemctl enable hello-world.service && sudo systemctl start hello-world.service"
We use SSH to connect and run a few commands to put the binary into /opt, the systemd service definition
into /etc/systemd/system and run the enable and start commands.
Create the AMI
I think this might be better implemented with some sort of callback if I could, but I’d have to trawl through some docs to see if it was even possible. For now, we’ll make the call and just enter a wait loop while EC2 sorts itself out
export AMI_ID=`aws ec2 create-image \
  --instance-id $INSTANCE_ID \
  --name hello-world-$CI_COMMIT_SHORT_SHA \
  --query ImageId \
  --output text`
We give it a name that includes the git short hash, which I like to do so that I know where this resource has come from.
As our final step here, we write the AMI ID into a text file and export it as an artifact to use in the deployment phase.
echo $AMI_ID > build/ami_idAs I keep saying, there’s gotta be a better way to do this. Just have to find it.
Deployment
This hinges on some pretty standard Cloudformation, which I’ve written about in this other blog entry. Check it out if you need a refresher on templates.
Our gitlab job looks like this, and really just runs the aws cloudformation deploy
command
Deploy:
  stage: deploy
  image: registry.gitlab.com/gitlab-org/cloud-deploy/aws-base:latest
  when: manual
  dependencies:
    - Build AMI
  script:
    - aws cloudformation deploy --no-fail-on-empty-changeset --template-file ./ServerTemplate.yml --stack-name test-hello-world --parameter-overrides VpcID=$VPC_ID Subnet=$SUBNET_ID ImageID=`cat build/ami_id`
Let’s break down the deploy command a little bit.
aws cloudformation deploy \
  --no-fail-on-empty-changeset \
  --template-file ./ServerTemplate.yml \
  --stack-name test-hello-world \
  --parameter-overrides VpcID=$VPC_ID Subnet=$SUBNET_ID ImageID=`cat build/ami_id`
We use the VPC_ID and SUBNET_ID variables as configured it gitlab, and we cat out
the AMI ID we wrote to the build/ami_id file in the previous step
Final Thoughts
This definitely isn’t an ideal solution. There’s a number of things I’d like to do around cleanup, but I’ll probably just let it lie for now and fix it if I need it in the future.